
웹팩은 가장 많이 사용되는 모듈 번들러이다.
1
2
$ npm install webpack webpack-cli -D
$ npm install lodash
1. 파일 설정
1
2
3
4
5
6
7
8
9
<!-- index.html -->
<html>
  <head>
    <title>Webpack Demo</title>
  </head>
  <body>
    <script src="./dist/main.js"></script>
  </body>
</html>
1
2
3
4
5
6
7
8
9
10
11
12
13
// src/index.js
import _ from "lodash";

function component() {
  var element = document.createElement("div");

  /* lodash is required for the next line to work */
  element.innerHTML = _.join(["Hello", "webpack"], " ");

  return element;
}

document.body.appendChild(component());
2. 빌드 명령어 설정
1
2
3
4
5
6
7
8
9
10
11
12
13
14
15
16
17
18
19
20
21
22
23
24
25
26
27
28
29
// package.json

{
  "name": "npm",
  "version": "1.0.0",
  "description": "",
  "main": "index.js",
  "scripts": {
    "test": "echo \"Error: no test specified\" && exit 1",

    // 커스텀 명령어 설정
    "build": "webpack --mode=none"
  },
  "keywords": [],
  "author": "",
  "license": "ISC",
  "devDependencies": {
    "webpack": "^5.74.0",
    "webpack-cli": "^4.10.0"
  },
  "dependencies": {
    "lodash": "^4.17.21"
  },

  // false 로 설정하면 사용하지 않는 export는 제거해도 괜찮다는 것을 webpack에게 알릴 수 있다.
  // TreeShaking
  "sideeffects": false
}
- script속성에 build 명령어를 설정한다.
- 만약 build 명령어에
--mode=none이 설정하지 않고 명령어를 사용하면 다음과 같은 에러 메시지가 뜬다.
1
2
3
4
5
# mode를 설정하지 않으면 결과물이 난독화 되어있음.
WARNING in configuration
The 'mode' option has not been set, webpack will fallback to 'production' for this value.
Set 'mode' option to 'development' or 'production' to enable defaults for each environment.
You can also set it to 'none' to disable any default behavior. Learn more: https://webpack.js.org/configuration/mode/
1
2
# 스크립트에서 정의한 빌드 명령어
$ npm run build
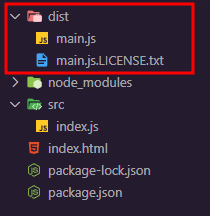
- build하면 dist 폴더가 생성된다.
- 결과 파일은 dist 폴더 밑의 main.js로 생성되어 있다.
3. 설정 파일
결과물의 파일 경로나 웹 자원의 대상을 지정하고 싶으면 다음과 같이 package.json의 script속성을 수정할 수 있다.
1
2
3
  "scripts": {
    "build": "webpack --mode=none --entry=src/index.js --output=dist/main.js"
  },
그런데 이는 일일이 작성하기 불편하기 때문에 웹팩 설정 파일webpack.config.js을 사용할 수 있다.
1
2
3
4
5
6
7
8
9
10
11
12
13
// webpack.config.js

var path = require('path');

module.exports = {
  mode: 'none',
  entry: './src/index.js',
  output: {
    filename: 'main.js',
    // __dirname: 현재 실행 중인 폴더 경로를 의미한다.
    path: path.resolve(__dirname, 'dist')
  }
};
- path 라이브러리
- output: entry에 있는 파일을 대상으로 webpack을 돌려서 결과물을 만드는 경로를 지정할 수 있다.
- webpack으로 변환한 결과 파일이 저장되는 경로
1
2
3
4
// package.json의 script 수정
  "scripts": {
    "build": "webpack"
  },
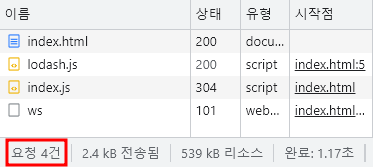
4. 웹팩 변환 전후 비교
변환 전
변환 후
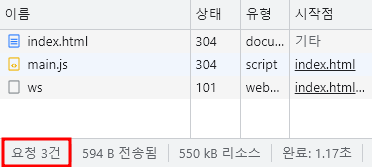
요청 수가 줄어든 것을 확인할 수 있다. 현재는 라이브러리를 1개만 설치해서 큰 효과가 없지만 프로젝트 규모가 커질 수록 효과는 클 것이다.