
Read는 퍼포먼스에 많은 영향을 미친다. 서로 연결되어 있는 데이터를 가공, 조합해야 하기 때문에 DB 설계를 어떻게 하느냐 따라 성능이 달라진다.
만약 다음과 같은 콜렉션을 가진 데이터베이스가 있다고 가정해보자.
| 콜렉션 | 관계 |
|---|---|
| User | 1 |
| Blog | N |
| 콜렉션 | 관계 |
|---|---|
| User | N |
| Blog | N |
| Comment | 1 |
1
2
3
4
5
6
7
8
9
10
11
12
13
14
15
16
17
18
{
    id: "Blogid",
    title: "BlogTitle",
    content: "BlogContent",
    user: {
        id: "userId",
        username: "username"
    },
    comments: [
        {
            content: "content",
            user: {
                id: "userId",
                username: "username"
            }
        }
    ]
}
일반적으로 프론트는 위와 같은 데이터를 원한다. 게시글에 대한 정보를 보낼 때, 해당 게시글과 관련된 댓글과 유저에 대한 정보도 전달해야 하는 것이다.
그렇다면, 이러한 데이터 구조를 만드는 방법에 대해서 알아보자.
1. 데이터를 직접 요청
매번 필요한 정보를 요청하여 데이터를 client에서 가공한다.
이는, 클라이언트가 백엔드에 요청하는 호출은 최소화 해야 하기 때문에 비효율적인 방법이다.
1
2
3
4
5
6
7
8
9
10
11
12
13
14
15
16
17
18
19
20
21
22
23
24
25
26
27
28
29
30
31
32
33
34
35
36
37
38
39
40
41
42
43
44
// client.js

import axios from "axios";

const URI = "http://localhost:3000";
const BLOG_URI = `${URI}/blog`;
const USER_URI = `${URI}/user`;


const test = async () => {
console.time("loading time: ");
let {
  data: { blogs },
} = await axios.get(`${BLOG_URI}`);

blogs = await Promise.all(
  blogs.map(async (blog) => {
    const [res1, res2] = await Promise.all([
      // 게시글 작성 유저 정보 요청
      axios.get(`${USER_URI}/${blog.user}`),

      // 게시글 정보 요청
      axios.get(`${BLOG_URI}/${blog._id}/comment`),
    ]);
    blog.user = res1.data.user;

    // 게시글 댓글, 댓글 작성 유저 정보 요청
    blog.comments = await Promise.all(
      res2.data.comments.map(async (comment) => {
        const {
          data: { user },
        } = await axios.get(`${USER_URI}/${comment.user}`);
        comment.user = user;
        return comment;
      })
    );

    return blog;
  })
);

console.dir(blogs[0], { depth: 10 });
console.timeEnd("loading time: ");
};
- 데이터가 많아지면 많아 질 수록 호출 수가 증가하기 때문에 데이터를 가공하고 합치는데 시간이 너무 걸린다.
- 클라이언트가 백엔드에서 게시글 목록을 요청할 때 각 게시글에 대한 작성자 정보, 댓글, 댓글의 작성자 정보를 따로 요청하게 되는데 게시글의 개수가 N개일 경우, N+3 번의 요청이 발생하는 것이다.
이러한 현상을 N+1 Problem라고 한다. 클라이언트가 하나의 리소스에 대한 정보를 요청할 때, 관련된 다른 리소스를 하나씩 요청하는 경우에 발생한다.
이를 방지하기 위해서는 백엔드에서 한 번에 필요한 모든 데이터를 포함하여 클라이언트에 응답하는 것이 좋다. 또한, 클라이언트에서 한 번에 필요한 모든 데이터를 요청하는 것도 좋은 방법이다.
2. Populate()
populate()메서드는 한 문서에서 다른 문서로의 참조 관계를 처리할 때 사용하며참조 관계를 가지는 두 문서의
_id값을 기준으로 연결한다.
populage()메서드를 사용하면 참조 관계를 가진 데이터들을 한 번에 클라이언트에게 보내는 데 용이하다.
1) Schema 수정
먼저 BlogSchema를 통해 comments에 접근하기 위해 가상 keys를 BlogSchema에 추가해야 한다.
1
2
3
4
5
6
7
8
9
10
11
12
13
14
15
16
17
18
19
20
21
22
23
24
25
26
27
28
29
// src/models/Blog.js

import { Schema, model, Types } from "mongoose";
import { CommentSchema } from "./Comment.js";

const BlogSchema = new Schema(
  {
    title: { type: String, required: true },
    content: { type: String, required: true },
    isLive: { type: Boolean, required: true, default: true },
    user: { type: Types.ObjectId, required: true, ref: "user" },
  },
  { timestamps: true }
);

// 가상의 key를 만들어 comments에 접근한다.
// commentSchema의 blog 필드를 통해 연결되어 있어 가능하다. (역참조를 위한 설정)
BlogSchema.virtual("comments", {
  ref: "comment",       // 어떤 모델인가
  localField: "_id",    // 참고해야 하는 필드는 무엇인가
  foreignField: "blog", // 어떻게 연결되어있는가
});

BlogSchema.set("toObject", { virtuals: true });
BlogSchema.set("toJSON", { virtuals: true });

const Blog = model("blog", BlogSchema);
export default Blog;
vitrual()은 데이터베이스에 저장되지 않은, 스키마에 정의된 프로퍼티의 가상 필드를 생성하는 메서드이다.- 예를 들어, 사용자 도큐먼트에서 이름과 패스워드 필드를 갖는데, 사용자의 전체 이름을 구성하는 가상 필드를 생성할 수 있다.
- 가상 필드는 데이터베이스에 저장되지 않지만, 사용자 문서에서 사용 가능한 프로퍼티이다.
virtual()메서드를 사용하면 역참조 관계를 모델에서 정의할 수 있다.- 가상 속성을 추가하고 이 가상 속성에서 지정된 경로의 문서를 참조 할 수 있다.
2) API 수정
1
2
3
4
5
6
7
8
9
10
11
12
13
14
15
// src/routes/Blogroute.js

blogRouter.get("/", async (req, res) => {
  try {
    // 연결시킬 데이터를 populate를 사용하여 참조해준다.
    // {path: "user}: 게시글 작성 유저
    // {path: "comments", populate: {path: "user"}}: 댓글, 댓글 작성 유저
    const blogs = await Blog.find({})
      .populate([{ path: "user" }, { path: "comments", populate: { path: "user" } }]);
    return res.send({ blogs });
  } catch (error) {
    console.log(error);
    res.status(500).send({ error: error.message });
  }
});
이렇게 populate()를 활용해 참조한 데이터를 탐색하여 한번에 클라이언트에게 전달할 수 있다.
확실히, 클라이언트와 백엔드간의 통신의 횟수는 1번으로 줄였지만 참조한 데이터를 탐색하는 데 시간이 걸리기 때문에 다른 방법이 좀 더 효율이 좋을 수 있다.
3. Nesting (문서 내장)
Nesting은 하나의 문서 안에 다른 문서를 포함하는 과정을 말한다.
포함된 문서는 부모 문서의 필드로 저장된다.
Nesting을 통해 관련 데이터를 함께 저장하여, 관련 데이터가 별도의 컬렉션에 저장되어 있는 경우에 비해 검색하고 조작하는 것이 더 효율적인 방법이다.
특히 몽고 DB는 수평적인 확장이 굉장히 용이 하기 때문에 데이터 용량 자체가 크더라도 괜찮다. (그래도 16mb 이상이 되어서는 안된다.)
- 관련 데이터가 하나의 문서에 함께 저장되어 데이터의 일관성이 향상된다.
- 별도의 컬렉션에 대한 여러 읽기와 쓰기 작업이 줄어들어 성능이 향상도니다.
- 관련 데이터가 하나의 문서에 저장되어 하나의 단위로 조작하기 쉽다.
1) Schema 수정
1
2
3
4
5
6
7
8
9
10
11
12
13
14
15
16
17
18
19
20
21
22
23
24
25
26
27
28
29
30
31
32
33
34
// src/models/commentRoute.js

import { Schema, model, Types } from "mongoose";
import { CommentSchema } from "./Comment.js";

// 관계형 DB 만들기
const BlogSchema = new Schema(
  {
    title: { type: String, required: true },
    content: { type: String, required: true },
    isLive: { type: Boolean, required: true, default: true },

    // 1 필요한 model을 내장시킨다.
    user: {
      _id: { type: Types.ObjectId, required: true, ref: "user" },

      // 여기에는 unique: true 속성을 주면 안된다. (여러 유저가 작성할 수 있음)
      username: { type: String, required: true },
      name: {
        first: { type: String, required: true },
        last: { type: String, required: true },
      },
    },

   // 2. Schema 자체를 내장시킬 수도 있다.
    comments: [CommentSchema],
  },
  { timestamps: true }
);


const Blog = model("blog", BlogSchema);
export default Blog;
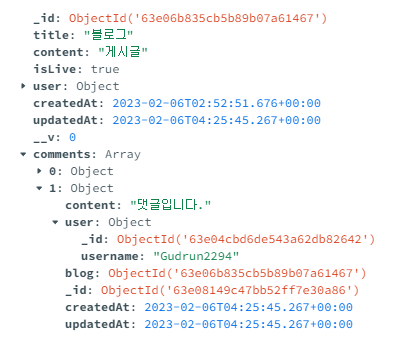
이렇게 Schema를 수정하면 다음과 같은 도큐먼트를 확인할 수 있다.
(Nesting은 이렇게 관련된 데이터를 한번에 저장하는 것이다. 자식 문서를 부모 문서에 아예 저장시킴으로 Read작업이 정말 간소해진다. )
2) API 수정
유저나 댓글이 수정, 삭제되면 게시글에 저장된 정보도 같이 수정, 삭제를 해야 한다.
1
2
3
4
5
6
7
8
9
10
11
12
13
14
15
16
17
18
19
20
21
22
23
24
25
26
27
28
29
30
31
32
// src/routes/commentRoute.js

commentRouter.patch("/:commentId", async (req, res) => {
  const { commentId } = req.params;
  const { content } = req.body;

  if (typeof content !== "string") {
    return res.status(400).send({ error: "content is required" });
  }

  // comments 배열안에 _id의 값이 comment._id와 동일한 것을 찾아서 수정한다.
  const [comment] = await Promise.all([
    Comment.findOneAndUpdate({ _id: commentId }, { content }, { new: true }),

    // $를 사용하면 filter를 통해 선택된 도큐먼트를 가리킨다.
    // 원래는 comments[index].content = value로 저장해야 하지만 index를 모르기 때문에 $를 사용하는 것이다.
    // 즉, comments.$는 comments._id가 comment_id인 comment를 의미한다.
    await Blog.updateOne({ "comments._id": commentId }, { "comments.$.content": content }),
  ]);

  return res.send({ comment });
});

commentRouter.delete("/:commentId", async (req, res) => {
  const { commentId } = req.params;
  const comment = await Comment.findOneAndDelete({ _id: commentId });

  // $pull 연산자는 일치하는 모든 값을 모두 제거한다. 만약 일치하는 값이 없다면 도큐먼트는 변경되지 않는다.
  await Blog.updateOne({ "comments._id": commentId }, { $pull: { comments: { _id: commentId } } });

  return res.send({ comment });
});
1
2
3
4
5
6
7
8
9
10
11
12
13
14
15
16
17
18
19
20
21
22
23
24
25
26
27
28
29
30
31
32
33
34
35
36
37
38
39
40
41
42
43
44
45
46
47
48
49
50
51
52
53
54
55
56
57
58
59
60
61
62
63
64
65
66
// src/routes/userRoutes.js

userRouter.put("/:userId", async (req, res) => {
  try {
    const { userId } = req.params;
    if (!mongoose.isValidObjectId(userId)) {
      return res.status(400).send({ error: "Invalid userId" });
    }
    const { age, name } = req.body;
    if (!age && !name) return res.status(400).send({ error: "age or name is required" });
    if (age && typeof age !== "number") return res.status(400).send({ error: "age must be a number" });
    if (name && typeof name.first !== "string" && typeof name.last != "string")
      return res.status(400).send({ error: "must be string" });

    let user = await User.findById(userId);
    if (age) user.ane = age;

    // user의 이름이 변경되면 블로그, 댓글에 대한 데이터도 변경해야 한다.
    if (name) {
      user.name = name;

      await Promise.all([
        // updateMany: 다수의 도큐먼트를 수정한다.
        Blog.updateMany({ "user._id": userId }, { "user.name": name }),

        // array filter를 사용하여 해당 유저가 작성한 모든 코멘트를 수정한다.
        // update 연산자에서 배열의 엘리먼트에 대한 조건적 업데이트를 지원하는 옵션이다.
        await Blog.updateMany(
          {},
          { "comments.$[elem].user.name": name },
          { arrayFilters: [{ "elem.user._id": userId }] }
        ),
      ]);
    }
    await user.save();
    return res.send({ user });
  } catch (error) {
    console.log(error);
    return res.status(500).send({ error: error.message });
  }
});

userRouter.delete("/:userId", async (req, res) => {
  try {
    const { userId } = req.params;
    if (!mongoose.isValidObjectId(userId)) {
      return res.status(400).send({ error: "Invalid userId" });
    }

    // 삭제
    const [user] = await Promise.all([
      User.findOneAndDelete({ _id: userId }),
      Blog.deleteMany({ "user._id": userId }),

      // $pull: {제거할 데이터: {조건}}
      Blog.updateMany({ "comments.user._id": userId }, { $pull: { comments: { "user._id": userId } } }),
      Comment.deleteMany({ user: userId }),
    ]);

    return res.send({ user });
  } catch (error) {
    console.log(error);
    return res.status(500).send({ error: error.message });
  }
});
하지만, Nesting에도 제한이 있기 때문에 데이터 구조와 데이터 관계의 성격을 잘 파악하여 다음 중 하나를 선택하여 DB를 구축하면 된다.
- 참조 관계 활용
- 개별적으로 읽을 때도 있거나 내장하려는 문서가 자주 바뀔 경우
- 1:N 관계의 경우 N의 크기가 클 수록
- Nesting
- 같이 불러올 때가 많고 읽기 비중이 높을 경우
- 1:N 관계의 경우 N의 크기가 작을 수록